Indoor and small-space Edible Plants
11 Jan 13
BUD Organic Magazine, Ingredients for a healthy lifestyle
Issue #1
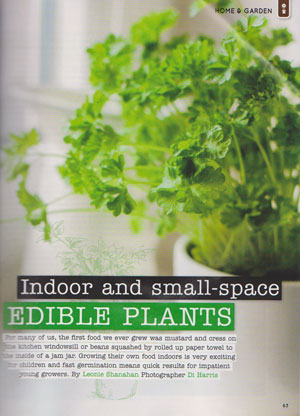
INDOOR AND SMALL-SPACE EDIBLE PLANTS
For many of us, the first food we ever grew was mustard and cress
on the kitchen windowsill or beans squashed by rolled up paper
towels to the inside of a jum jar. Growing their own food
indoors is very exciting for children and fast germinations means
quick results for impatient yound growers. By Leonie
Shanahan
The beauty of growing your own food and therefore eating the
freshest possible food is that you can do it with or without soil
and no matter where you live - on a boat, in a caravan, or in a
house. There are ways of growing food in the sun or in the
shade and it does not matter how old or young you are.
Everyone can grow something fresh and nutritious and
delicious!.
Most food starts with a seed. Get that right and you are
off to a good start.
Seed
No matter what seed you use, you do the same amount of work (not
that I call gardening work - especially growing food with
children) so why not buy great Australian organic seed to start
with. It is full of uncontaminated nutrients and you will
be supporting an environmentally friendly Australian company and
you can be sure any seed you save will grow true to type.
Before you sow your seeds pour the amount of seed you want into a
shallow container and check for blemishes – throw away any
chipped, damaged or discoloured seeds. Take the time to look at
the variety, sizes and textures and wonder at how so much
good food can come from that tiny seed. If you harvest and
save your own seeds, be grateful for the abundance those seeds
will bring you and your family.
It is very important to learn the simple art of seed
saving. Each time we save organic non-hybrid, open
pollinating or heirloom seed, the seed is a little more adapted
to your own climate and conditions and becoming stronger and
hardier. Select the strongest, healthiest plant for seed
saving (yes, I know that can be hard!). Label the plant so
that others do not harvest from it. All the energy of the
plant should go into the seed.
To harvest the seed, wait until the seeds have matured, dried and
gone brown. Pick them and remove the seeds from the pod or flower
head. Place seeds into a small sealed plastic bag and then
into a labelled envelope or jar.
It is essential to label the seed. e.g.
Date: 7.7.2012
Name: Sweet basil
Place: OLR Caloundra Qld
Qty: 50
 When you save
seed you will get hundreds of seeds to plant for next season, all
from one plant! Amazing and all free! Children love
seed saving. It is very calming, connects them to the earth
and they are empowered by the knowledge that saving seed from one
plant could, next season, provide food for their family, friends
and school.
When you save
seed you will get hundreds of seeds to plant for next season, all
from one plant! Amazing and all free! Children love
seed saving. It is very calming, connects them to the earth
and they are empowered by the knowledge that saving seed from one
plant could, next season, provide food for their family, friends
and school.
Easy seeds to save are amaranth, basil, beans, cucumber, dill,
luffa, marigolds, pawpaw, peas, pumpkin, snow peas and
watermelon. Cucumber, pawpaw, pumpkin and watermelon seeds
are scraped from the ripe fruit and dried before storing.
Growing Indoors
With the colder weather upon us, gardening indoors or just
outside your window or door can be very appealing and
convenient. You can easily grow sprouts, microgreens and
herbs without venturing far outside.
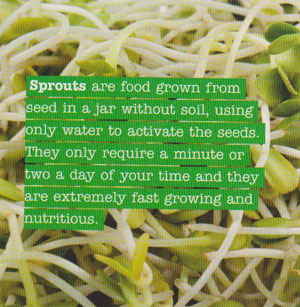
Sprouts are food grown from seed in a jar without soil, using
only water to activate the seeds and only require a minute or two
a day of your time. Sprouts are extremely nutritious, fast,
and fun to grow.
 Mung beans (seeds) are an
easy seed to start with. Good seeds to sprout during cool
weather are alfalfa, broccoli, fenugreekand and
radish.
Mung beans (seeds) are an
easy seed to start with. Good seeds to sprout during cool
weather are alfalfa, broccoli, fenugreekand and
radish.
Day 1: Place enough seeds (organic of course) into a jar.
Use enough seed to form a small layer at the base of your
chosen jar. Fill the jar with water and soak
for a day.
Day 2: Put muslin or other loose cloth or fine netting over
the jar opening and close with a rubber band. Tip the
water out, leaving the cloth on so the seeds don’t fall out,
refill the jar with clean water and rinse again. Leave the jar at
an angle, in a dish or ice-cream container to drain. The seeds
need air, which is why you put the jar on an angle. Later in the
day, repeat the procedure.
Day 3: By now you will probably be able to see little sprouts
appearing from the seeds. Carefully rinse the seeds / sprouts
twice (once in the morning and again later in the day) and leave
the jar on an angle as before. Continue the above process for
another 1 to4 days. The sprouts should then be ready to eat.
Sprouts can be eaten as they are or sprinkled on top of soups,
sandwiches or any other food. If a bit slimy, continue to
rinse. Once all sprouts are eaten, wash jar well and start
again!
Microgreens are seeds which are raised to produce young petite
edible greens. They usually take about 2 to 4 weeks from seed to
harvest, depending on the weather. When they are about 5cm
you snip the stems and leaves off near the base of the plant,
wash and add for a tasty addition to sandwiches, salads or
sprinkle on any dish. To grow microgreens inside you need
to have a window or ledge that gets around 4 hours of
sunlight a day. You also need a seedling tray or clear
plastic strawberry punnet type containers with holes in the
bottom or something similar. Punnets are ideal for small
batches and you can use the lid as well. Soak the seeds in
a weak solution of seaweed mix overnight. Place about 3cm
of organic potting mix with worm castings or coco peat into your
container and moisten. Sprinkle the seeds evenly on top and
sprinkle some shifted or fine potting mix or sand over the seeds
to cover them. Keep moist by spraying with water.
Good seeds to use for microgreens include amaranth, beetroot,
broccoli, kale, mesclun salad mix, peas and
sunflowers.
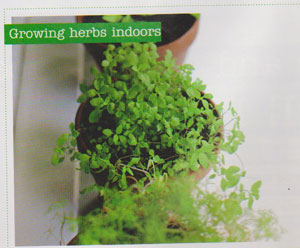
Y ou can grow herbs
indoors, in a pot or on a windowsill, or any sunny spot. It
is lovely to get the kids involved. They will enjoy
painting old pots with colourful, cheery pictures or words.
Be creative and think outside the square. You probably have
all sorts of potential herb pots around your home just waiting to
be put to a new use - gumboots, shoes, tins, old saucepans and my
favourite kettles and teapots. Make sure your container has
drainage holes - you may need to drill these in the bottom and
you may need to cover large holes with old shade cloth or netting
to keep the soil in. Fill half your container with
organic potting mix, add a sprinkle of rock minerals and about 10
chicken poo pellets, fill the rest of your container with more
potting mix then plant your herbs. If you are growing
indoors, you need fairly hardy herbs. Try chives, parsley,
rosemary, thyme and winter savory. Water them ‘in’
with a diluted solution of seaweed mix. Your potted plants
rely on you for their food and water, so fertilise with a spray
of diluted seaweed every 2-3 weeks and only water when the soil
has dried out.
ou can grow herbs
indoors, in a pot or on a windowsill, or any sunny spot. It
is lovely to get the kids involved. They will enjoy
painting old pots with colourful, cheery pictures or words.
Be creative and think outside the square. You probably have
all sorts of potential herb pots around your home just waiting to
be put to a new use - gumboots, shoes, tins, old saucepans and my
favourite kettles and teapots. Make sure your container has
drainage holes - you may need to drill these in the bottom and
you may need to cover large holes with old shade cloth or netting
to keep the soil in. Fill half your container with
organic potting mix, add a sprinkle of rock minerals and about 10
chicken poo pellets, fill the rest of your container with more
potting mix then plant your herbs. If you are growing
indoors, you need fairly hardy herbs. Try chives, parsley,
rosemary, thyme and winter savory. Water them ‘in’
with a diluted solution of seaweed mix. Your potted plants
rely on you for their food and water, so fertilise with a spray
of diluted seaweed every 2-3 weeks and only water when the soil
has dried out.
 It is so lovely to look
out your window in the morning and see food or flowers growing
just outside - such a positive way to start the day. These
days you can go to a hardware store and buy all sorts of window
boxes with brackets that mount easily to walls or
balcony’s. You can also hang baskets from your deck,
railing and verandah or pergola roofs. Trailing plants such
as nasturtiums and prostrate rosemary look great cascading down
from window boxes or hanging baskets. You can make your own
window box from recycled wood. Make sure your window box
drains well away from the house and that your brackets are strong
enough to hold your new garden.
It is so lovely to look
out your window in the morning and see food or flowers growing
just outside - such a positive way to start the day. These
days you can go to a hardware store and buy all sorts of window
boxes with brackets that mount easily to walls or
balcony’s. You can also hang baskets from your deck,
railing and verandah or pergola roofs. Trailing plants such
as nasturtiums and prostrate rosemary look great cascading down
from window boxes or hanging baskets. You can make your own
window box from recycled wood. Make sure your window box
drains well away from the house and that your brackets are strong
enough to hold your new garden.
Most food grows best in the sun, but thankfully there are plants
that are happy in the shade or part shade. Many of the
homes I have lived in haven’t had much of a backyard and most of
it has been in the shade. People would tell me all the time
I couldn’t grow this and that, but I did it anyway as that was
all I had and sometimes it did grow well! My advice to you
is to experiment. Plants that like or can handle, some
shade are asian greens, brazillian spinach, beetroot, bell
peppers, lebanese cress, lettuce, mesclun mix, mushroom plant,
radish, rainbow chard, spring onion and herbs such as chervil,
chives, coriander, lemon balm, marjoram, nasturtium, oregano,
parsley and pineapple sage. Ginger, turmeric and galangal
grow in shade.
Remember it’s always good to look at things through children’s
eyes. I still like to put my carrot and beetroot tops on
some paper towel in a saucer or lid with water and watch the mini
leaves start to grow again, like little bonsai, with stunning
colours and textures - another source of microgreens!
Experience the joy of growing something you can eat!
Gardening for the future of our children. Leonie Shanahan
Edible School Gardens
BUD Organic Magazine, Ingredients for a
healthy lifestyle Issue #1
Leonie Shanahan: Edible School Gardens,
Photographer: Di Harris
Need A Guest Speaker?
Latest News
Join our Newsletter
Find out the latest news and happenings with Edible School Gardens.
sign up here >>